How to get high Quality 'Star Citizen' style POM and mesh decals inside UE4
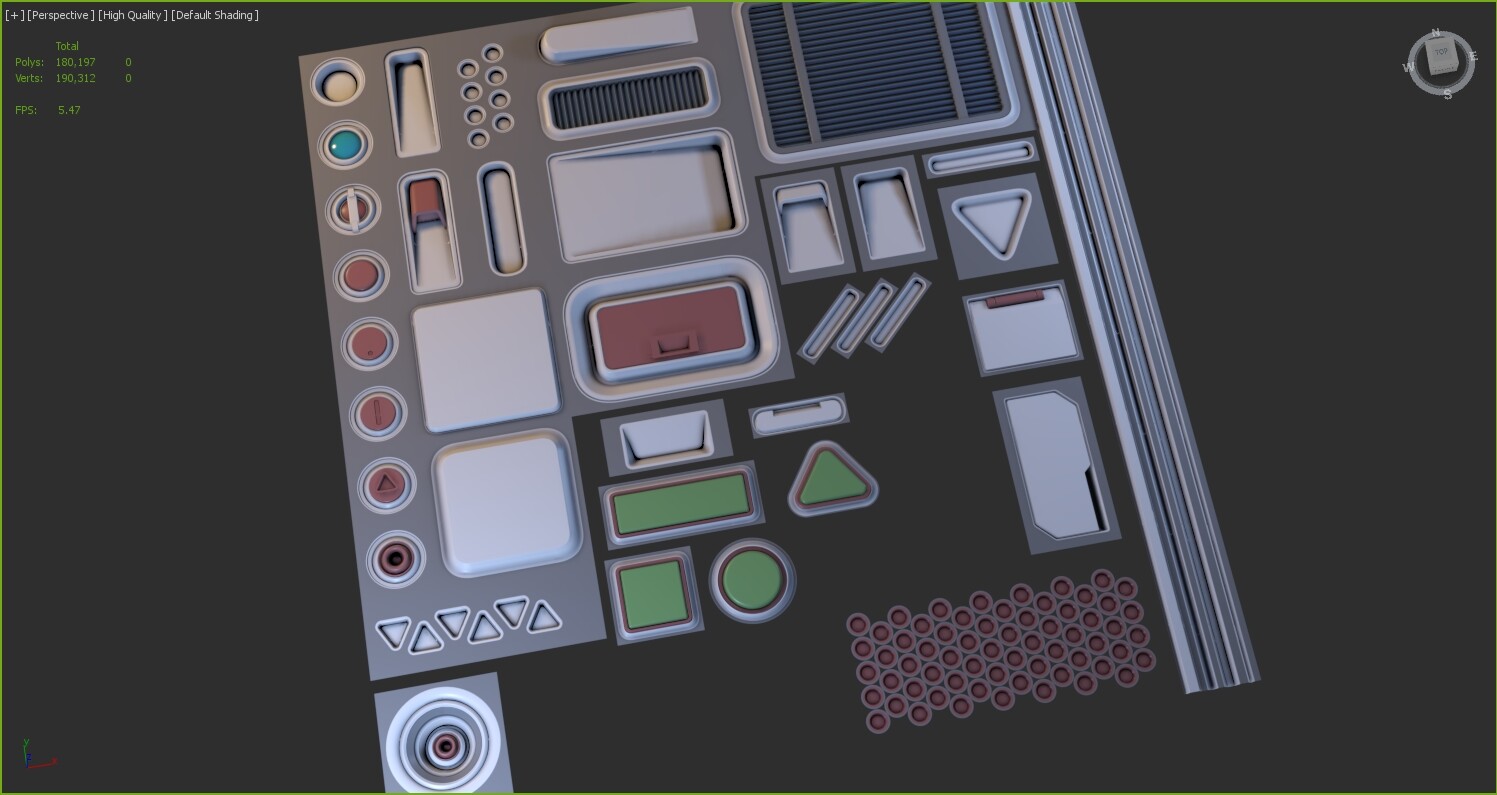
The first thing with any good POM decal sheet is a really nice clean high poly mesh to bake and work from. It doesn't really matter what program you use to create it, could be anything from 3ds Max to zBrush; Just so long as the meshes themselves are clean and bake well. In this project I personally used 3ds max to create the meshes and then rendered them out inside Marmoset Toolbag 3 as it gives a height map as well which is very much needed for this shader.
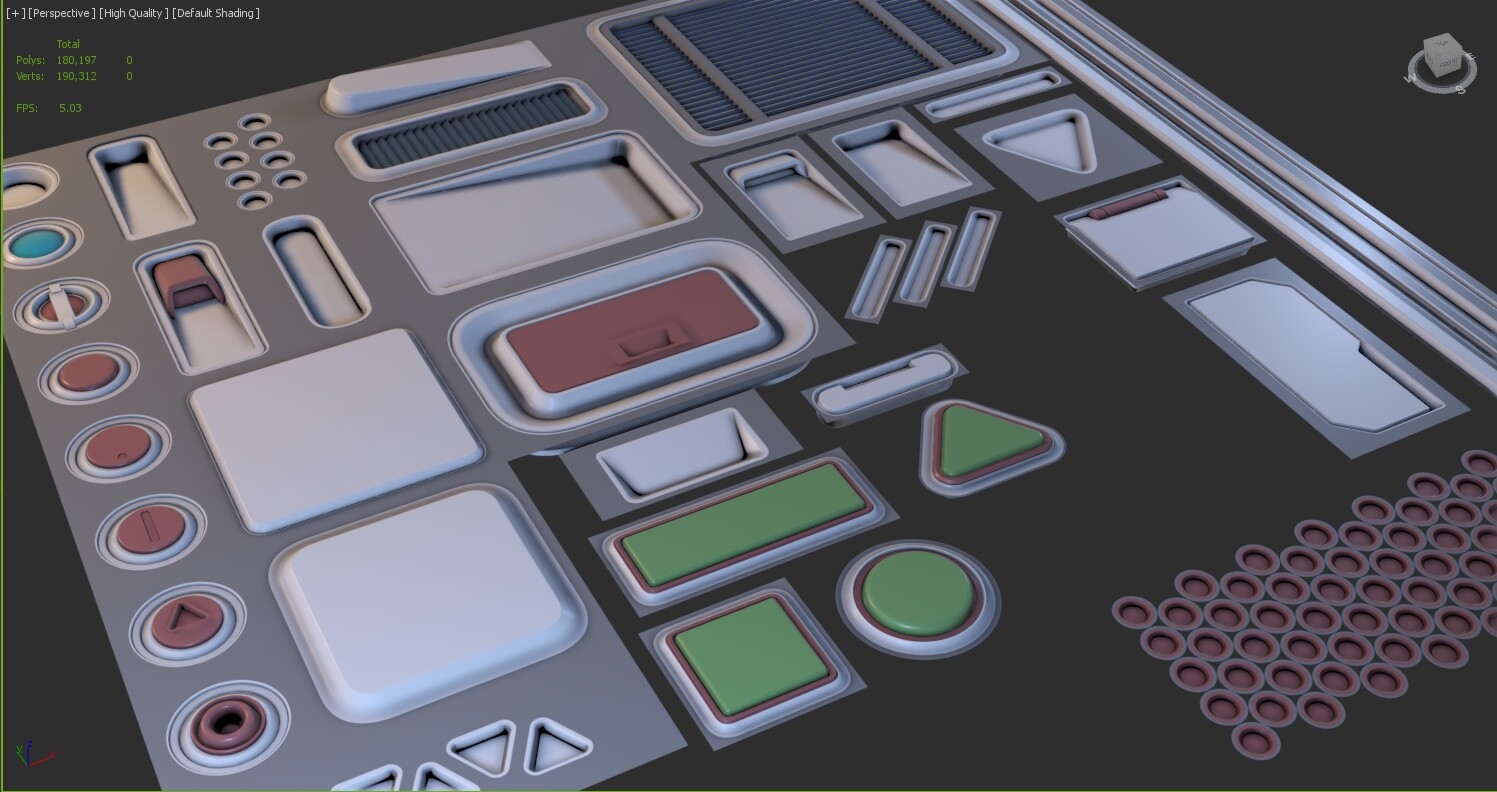
Also make sure you create a material ID mask for use later in Substance Painter etc; I did this by selecting elements in Max and giving them a different colour so when you come to bake out the maps the base colour map will basically become your colour ID mask; I also use the same method for creating the opacity map. As you can see here I've blocked out colours for the buttons and their edges, the grating and the tops of bolts etc, just to get some variation in the texture. Don't worry about any gaps between your meshes as we fix that later on putting the final maps together in Photoshop, this is mainly important for the height map as you don't want huge pits of black in the final material.
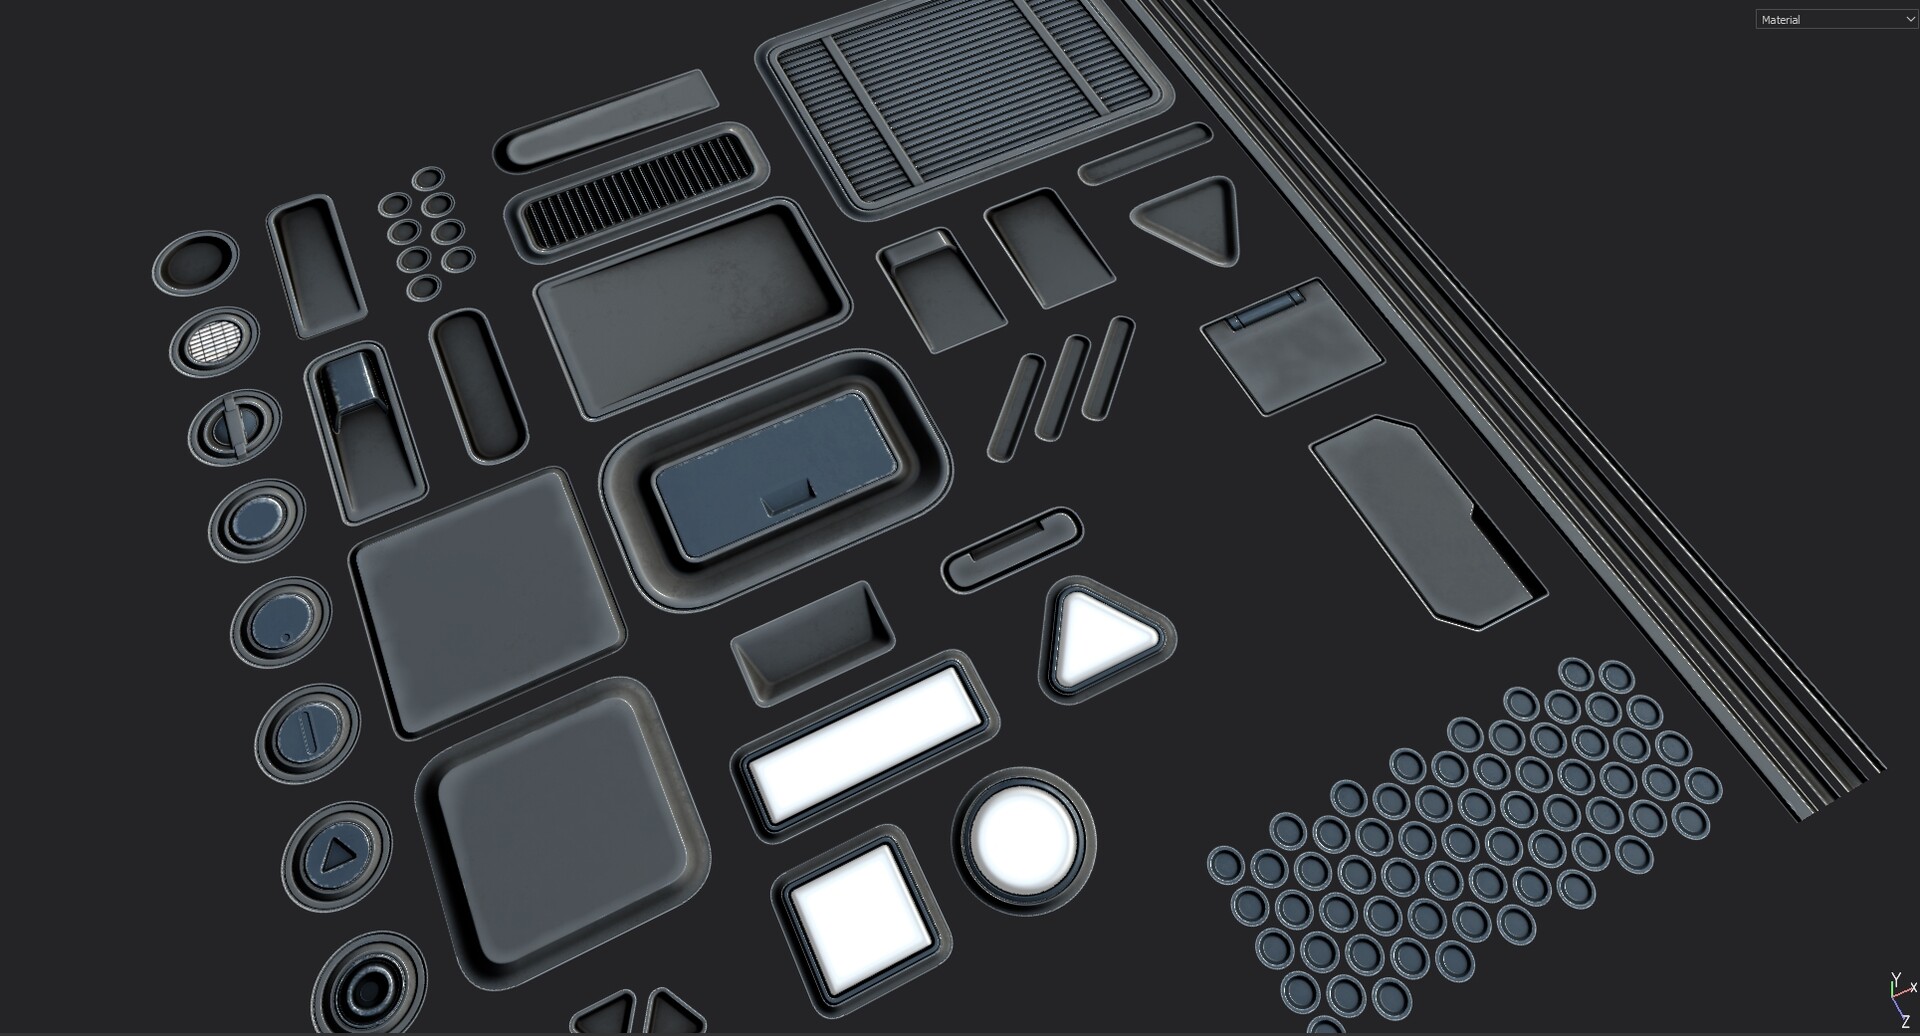
Once you've baked out your high poly and made sure they are no errors on the texture (A nice way I use to test it is just add the baked normal and height into the correct channels inside marmoset and then put a 0.05 roughness texture over the top, any issues will show up really fast with a super shiny surface!). Once you've made sure the bake has worked, take it into something like substance painter and create your texture for the POMs; This is where the colour ID mask, curvature and AO masks really come in handy to give you really nice results! As I have buttons and lights on my POM sheet I also created an emissive channel to bake out an emissive mask just using RGB values for use inside UE4 later on. - I will always bake out my maps at 4k, even if I don't plan on using them at that res in-game; It's easy scaling maps down, quite a bit harder to scale them up!
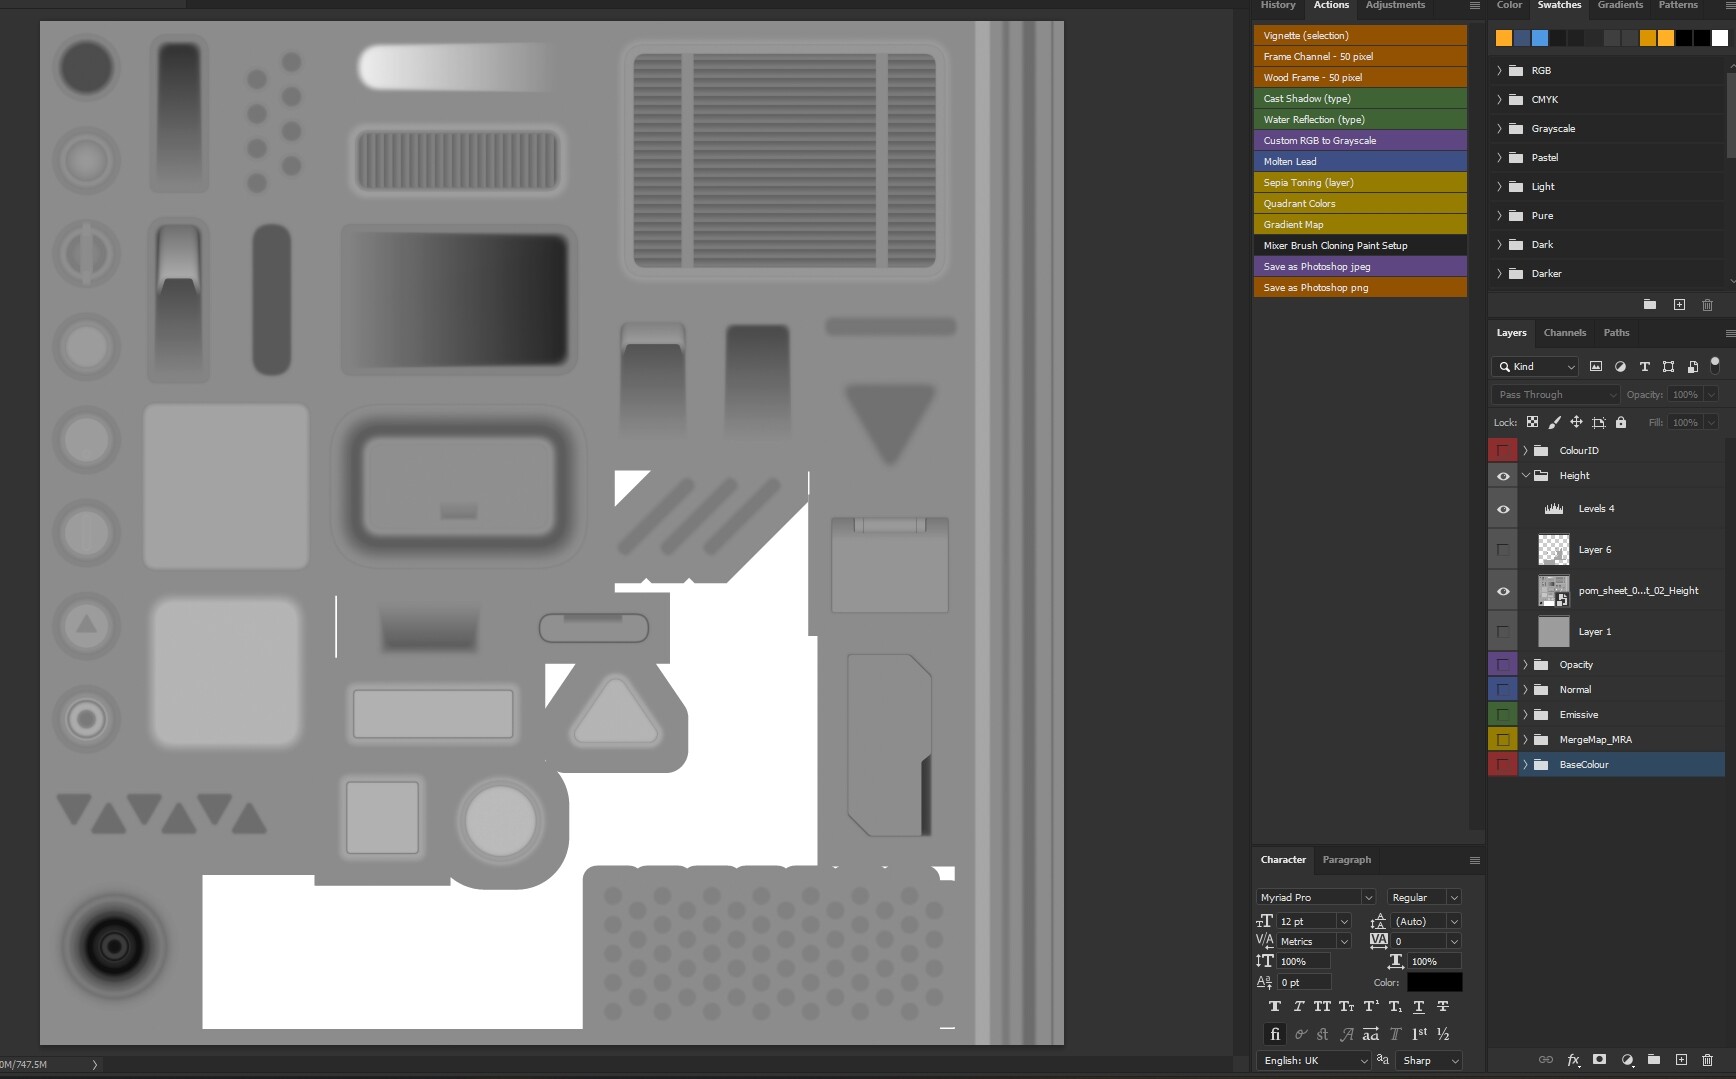
After you have exported your textures from your texturing software, the next step I do is to add the textures into a master Photoshop file which holds all the textures for a particular material, so in the POM's example it holds the Colour ID (Which is used for button and light colour swaps in UE4), Height (Holds height info used to create the parallax effect), Opacity, Normal, Emissive, MergeMap_MRA (This map holds the Metallic, Roughness and AO maps in separate RGB channels as a packed map to save on space), and the Base Colour maps. This basically just allows me to edit and tweak all the maps very quickly without having to route around trying to find the right map. As you can see from the image of the Height map, these white areas will prove annoying in UE4 if left so after making sure the main base grey is around 127,127,127 (This is important as it gives your height map the largest range of the high and low areas) just either paint out or fill the white space in the map so you have a nice consistent grey all through the map.
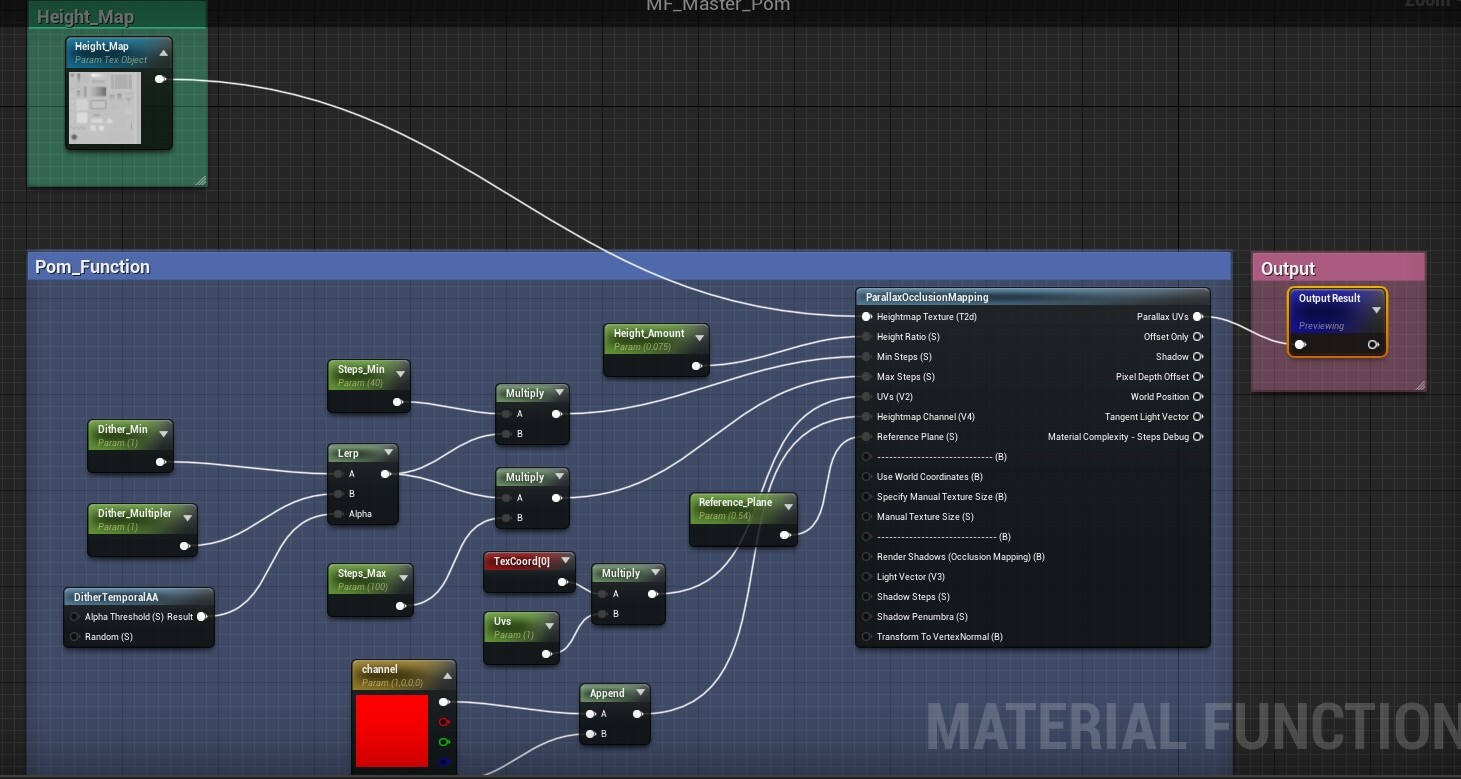
Once the maps have been saved out as PNGs or TIFFs etc its time to set up the material inside UE4. There are a couple of different methods for creating these materials and this is just one way I found worked quite effectively for me. I started off creating a material function (Right click in the Content Browser > materials and textures > material function) for the POM system itself, This just consists of the height map you just created, along with a parallax Occlusion Mapping node and several parameter nodes to be able to control stuff later on using material instances. The
Height Amount is to control the overall intensity of the POM, generally keeping this super low is good, but play around with the value to see what works for you.
Min and Max Steps are used to control the amount of 'layers' make up the POM effect, more layers equals a smoother look, but makes the material more expensive.
Dither Min and Multiplier are used to blend the steps together so it looks more realistic and natural.
Reference Plane is where the 127 grey comes in from the Photoshop document, this is basically the 'mid-point' of your POM, so anything whiter than mid grey will extend up, anything darker with extend down. So if your mid point is 200 grey, your reference plane will need to be set to .75 instead of .5 otherwise the parts of the texture you want to stay flat on a surface (think bolt indents, button edges etc) will start rising up as the reference plane is set too low.
UVs is used for things like tiling POM sheets like grates or vents for example so for this mine is just set to 1.
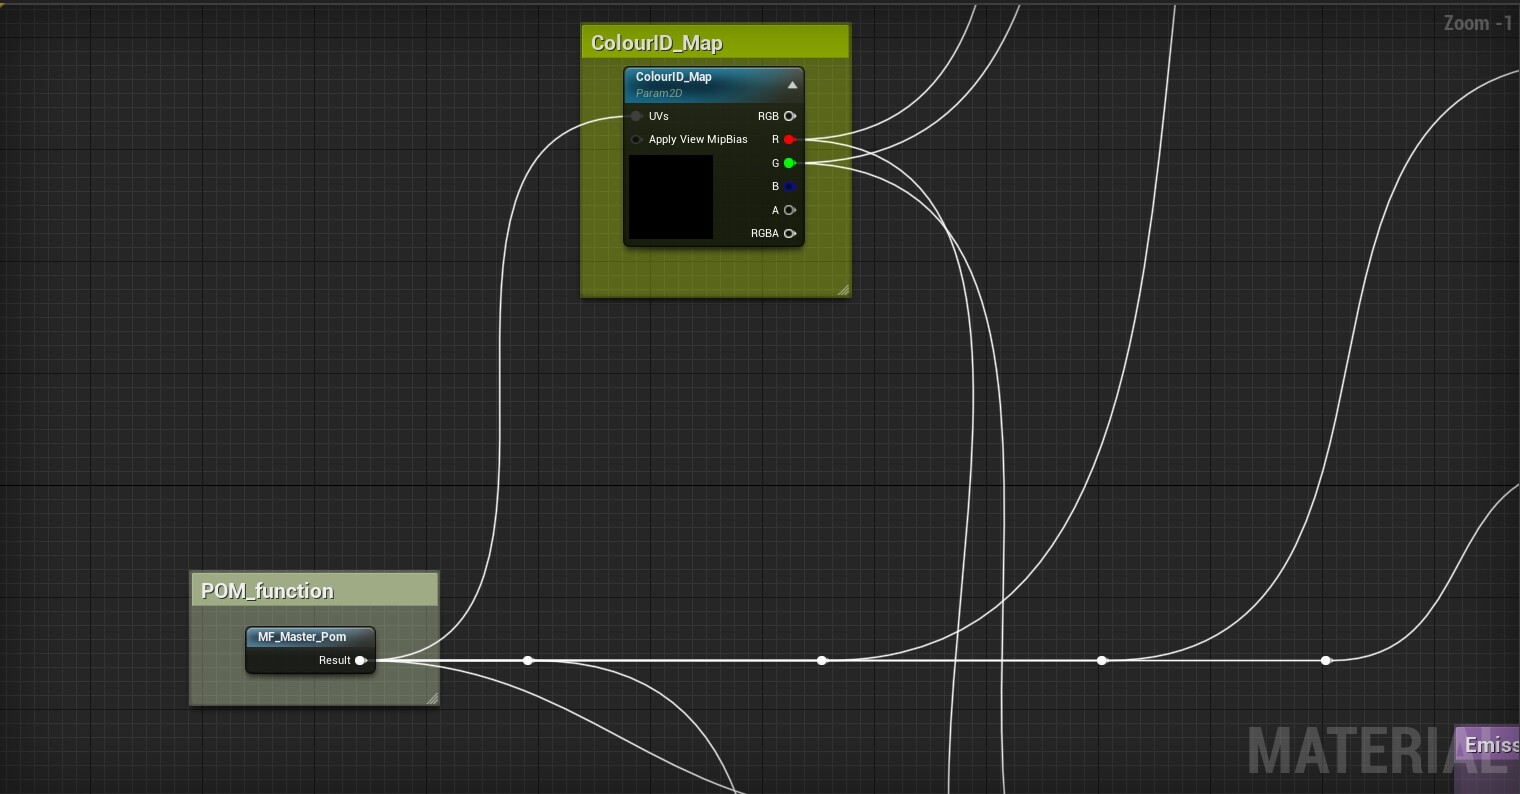
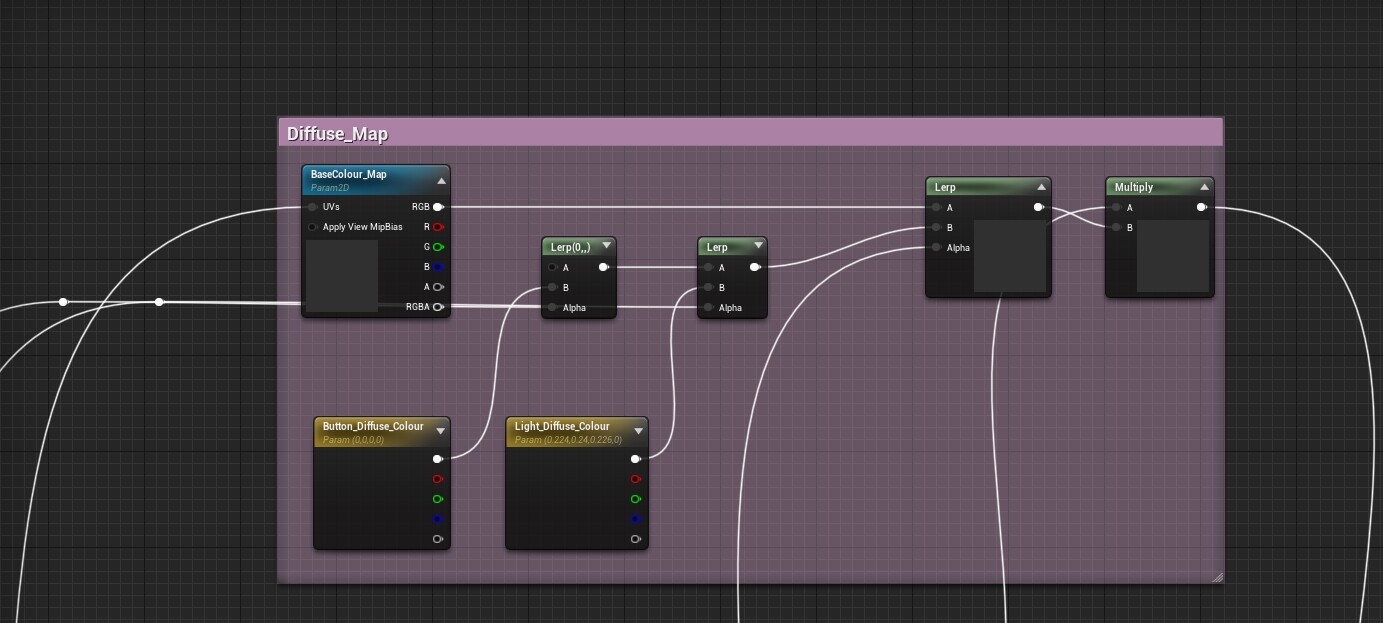
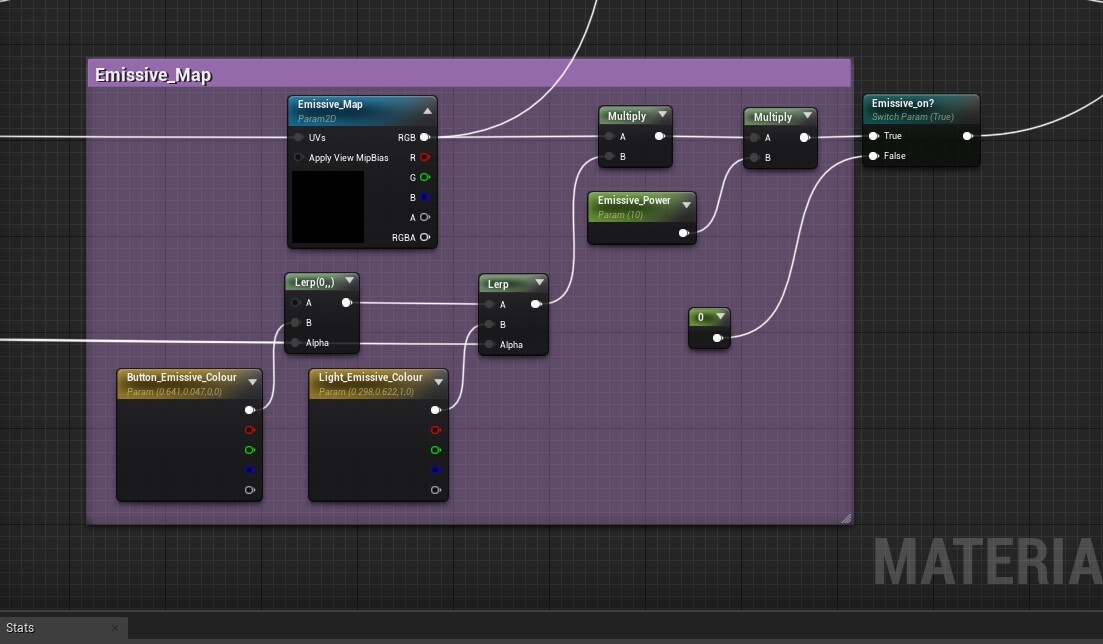
After you have set up the material function for the POM itself it's on to creating the master material. When you drag in the POM function, just connect it to the UVs input node of each texture parameter map. The colour ID map is used to mask the buttons and light emissive so I can control them inside the material instances. Make sure the Blend Mode is set to masked to allow you to use your Opacity mask. The base colour is just the imported map with two colour parameters that allow me to change the glow colours for the lights and buttons, the lerp alpha coming from the Colour ID mask. The same setup is used for the emissive channel too, using the same name in the colour nodes allows me to change them at the same time as the diffuse with no extra cost.
And this is the final output from the main material, this setup allows you to get nice extra details on a mesh really quickly, but what if you want them to take the colour of the underlying geo? \/
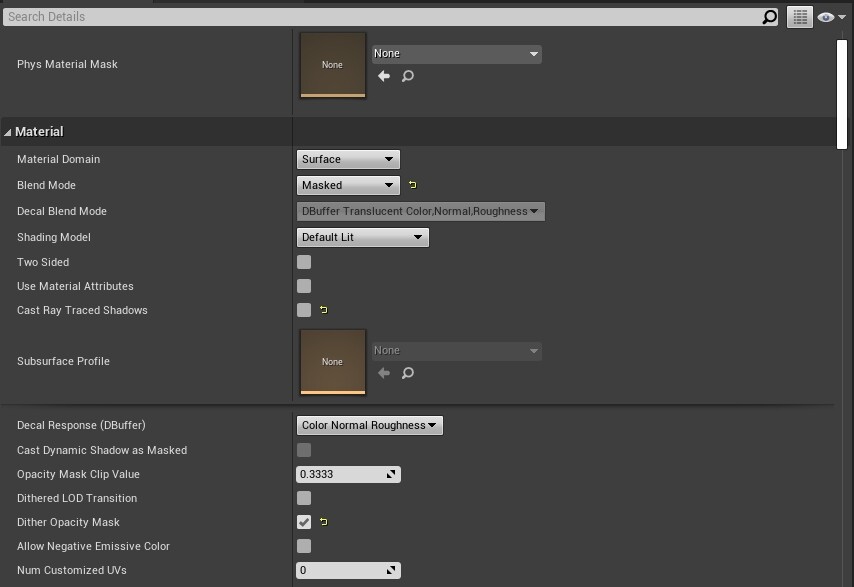
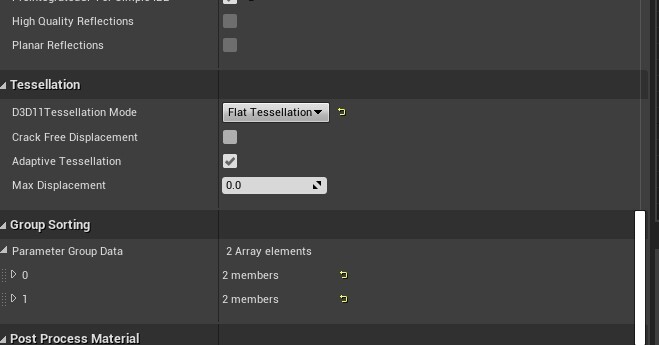
The setup for the translucent versions looks comically simple and it really is that easy haha! Using the same material function for the POM node, connect it to the opacity and normal map; Then go over to the material tab and change it from Surface to Deferred Decal and set the blending mode to Translucent. Depending on what information you want to come through you can change the Decal Blend Mode from DBuffer Translucent Normal to a couple of others, try them out and see which one gets the result you want. And one final thing to get this working correctly; Type in tessellation into the search bar and find D3D11Tessellation Mode, change it from no tessellation to flat tessellation; The reason for doing this is that if not selected your decals will start drawing over any object in front of it, even if its not part of the same mesh; Something to do with the order in which the frames are rendered and switching this corrects the error.
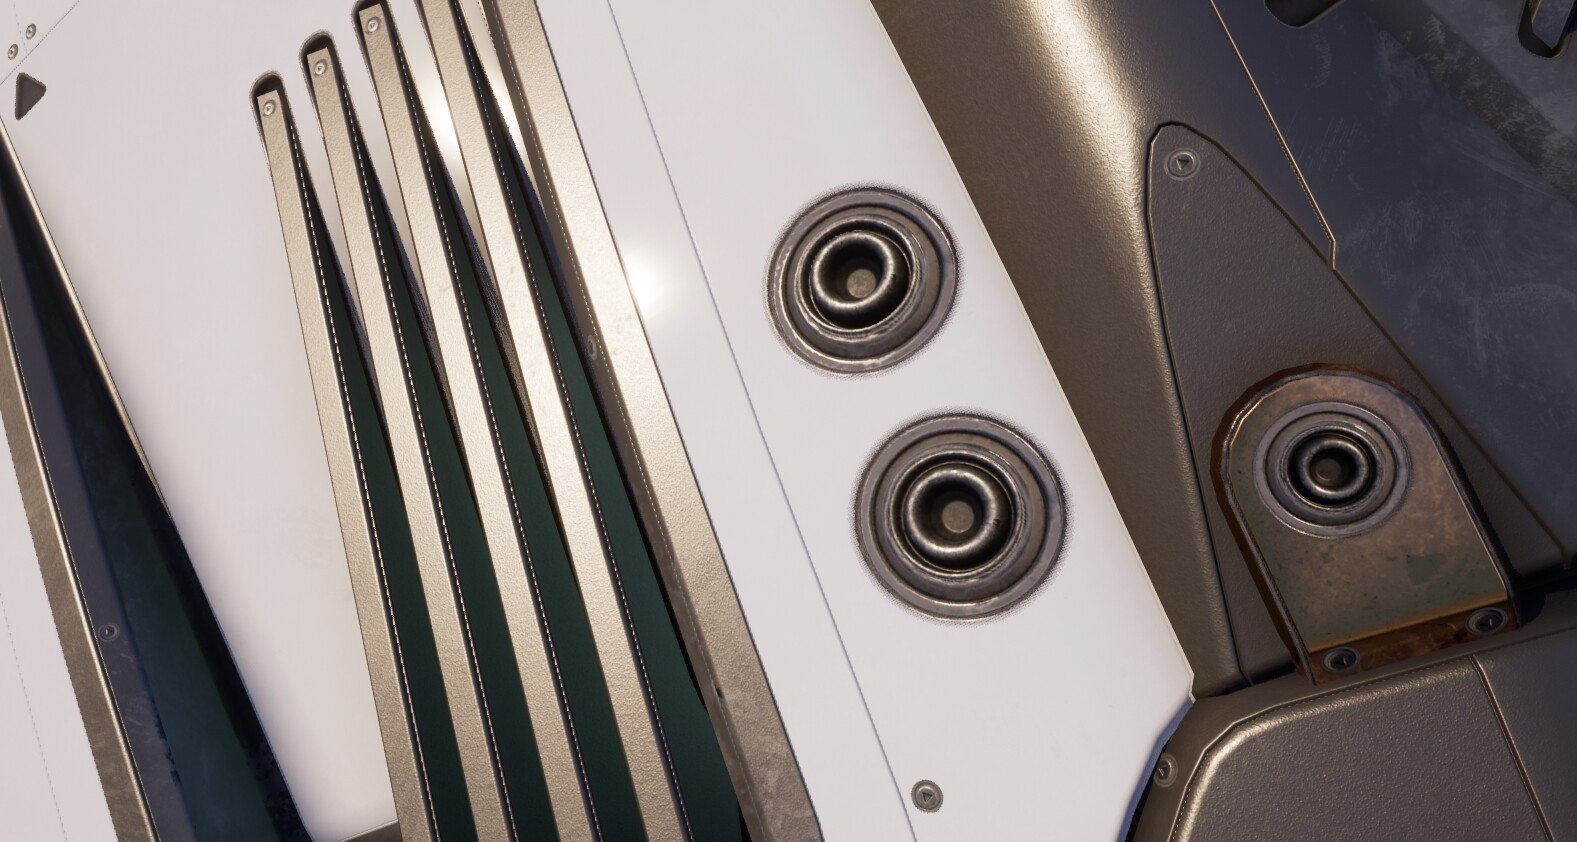
And this is the final output of the translucent POM material, It allows you to add surface detail and interesting breakup without standing out from the rest of the asset, really useful for things like panel lines and indents.
I hope this super brief guide helps you to create some super sweet POMs and trims inside UE4 and I'll be doing several little guides for several of the materials for my latest project so stay tuned!